Deploy
Learn the different methods of form deployment to your respondents
Before deploying your form, it is essential that your form is checked over by yourself and another person. Any bugs or mistakes can be modified prior to the deployment of your form, and ensures that no live editing is necessary. See the 'Preview' topic to view your form in a different tab.
The 'Deploy' heading provides multiple form sharing options to share to your respondents. The features available are all automatically set to be personal to your form e.g. the QR code is made specific to the form you are editing. Simply copy and paste or follow the instructions available within all of the sub-headings to easily share your form to your respondents.
Select the following sub-headings for more information:
Linking to your Form |
Embed the Form |
QR Code |
Send via Email |
Send from Mail List |
Sent Messages |
Linking to your Form

The 'Linking to your Form' sub-heading provides you with a number of links with different methods for deploying your form. The best method for linking to your form will depend upon the type of form, and the audience you wish to complete it. All of the options to link to your form have a 'Test the Link' button to preview what it would look like when incorporated. You can also incorporate more than one of the links listed below:
Link to your Form from an Email note or IM: This is your form URL to provide access to respondents. This can be copied and used in social media links or even as a simple message. See the 'Short Form URL' setting to see how to edit the default URL link for your form.
Link from a Web Page: This is your form link to insert into your web page. To edit the link text on your web page, insert your text between the '<a>' and '</a>' HTML tags.
Create a Popup link from your Web Page: This is your form link to insert into your web page, but this link will create a pop-up link to the form. A pop-up link ensures your respondent never leaves your website. The pop-up window will close after the form has been completed by the respondent.
Embed the Form
The 'Embed the Form' sub-heading enables you to embed your form directly on your own online website. Simply copy and paste either of the two options into your website.
Embed your Form in a web page: This is the code to insert into your web page to embed your form online. Embedding your form into your web page ensures the respondent will not leave your website and will be more likely to complete the form.
Embed Full Page: This is the code to insert into your web page to embed the full form page online, whilst adding your own website header and footer into it.
Iframe Embed: Using Iframe is the easiest way to embed the form in your web page within an isolated frame. Iframe lets you create a box on your web page whose contents are loaded from another URL. This method gives you control over the height and width in the actual embed code.
QR Code
The 'QR Code' sub-heading creates a scannable code allowing easy access to your form from any device.
To use the code, simply take a picture of it on your smart phone or device and it will read the QR code and convert it to a web link. Alternatively, you can right click on the QR code and download the form to use elsewhere for respondents to scan.
Send via Email
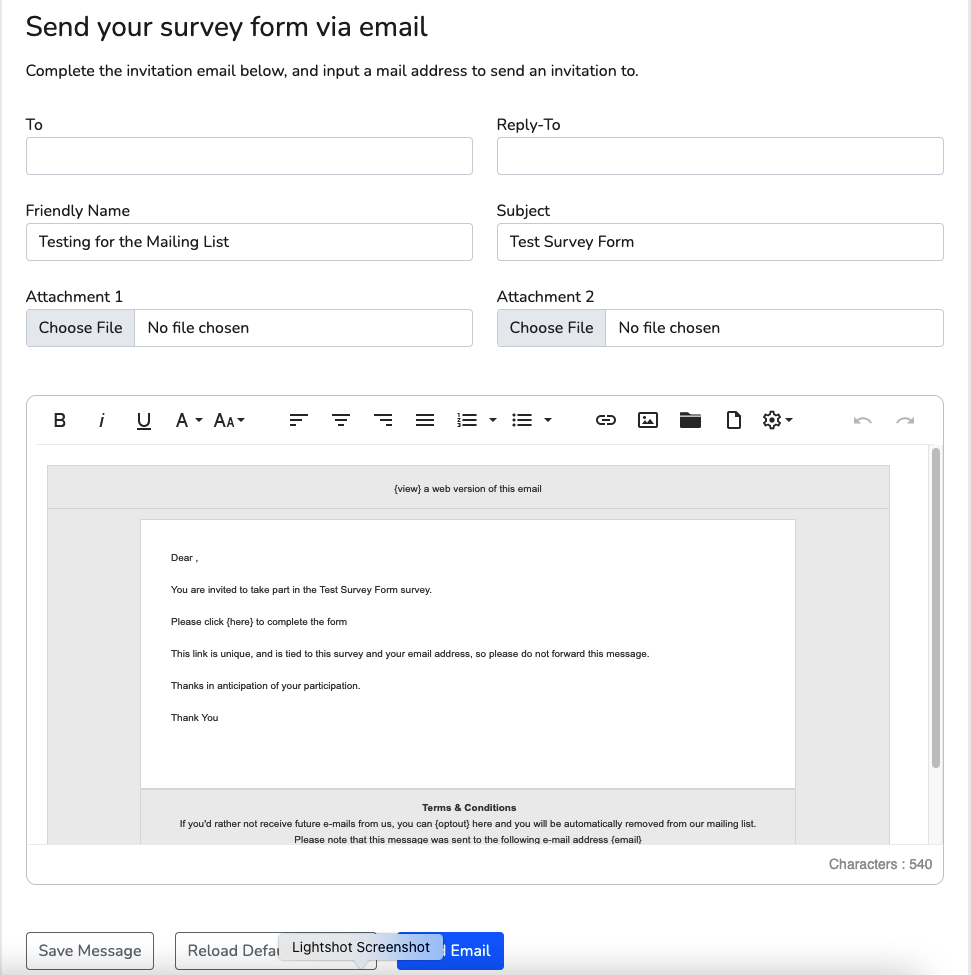
The 'Send via Email' sub-heading allows you to create an email invitation to send out to one respondent. A default email invitation message is displayed to begin with, and you can edit this to suit your form.
To: Edit the recipients email address.
Subject: Edit the email subject name. This will automatically be set to the title of your form if not defined.
Friendly Name: Edit the email friendly name. This will automatically be set to a default example if not defined.
Reply-To: Edit the email address that will receive emails when a recipient replies to your invitation.
Attachment 1: Add a file from your assets library using the 'Browse Server' button to attach to the email.
Attachment 2: Add a second file from your assets library using the 'Browse Server' button to attach to the email.
UDF Fields: Edit the UDF (user defined field) fields which will replace the parameters in the email message. See the 'Hidden Fields' topic for more information.
Save Message: Save the custom email invitation for the form so it does not reset back to the default message.
Reload Default Message: This button will reset your custom email invitation message back to the default email invitation message.
Send Email: This will send out the email with your custom invitation settings.
Send from Mail List
The 'Send from Mail List' sub-heading allows you to create an email invitation to send out to a mail list. This section is very similar to the previous 'Send via Email' section, but you can not set UDF fields here as they are defined within the original 'Mailing List' that you will create prior this section. The form may be customised with information personal to each respondent which has previously been saved into your mailing list entries. This data may also be passed into your forms data via the use of hidden fields in your form.
To: Edit the mailing list from your accounts mail lists that you would like to send to from the drop-down menu.
Subject: Edit the email subject name. This will automatically be set to the title of your form if not defined.
Friendly Name: Edit the email friendly name. This will automatically be set to a default example if not defined.
Reply-To: Edit the email address that will receive emails when a recipient replies to your invitation.
Attachment 1: Add a file from your assets library using the 'Browse Server' button to attach to the email.
Attachment 2: Add a second file from your assets library using the 'Browse Server' button to attach to the email.
Save Message: Save the custom email invitation for the form so it does not reset back to the default message.
Reload Default Message: This button will reset your custom email invitation message back to the default email invitation message.
Send Email: This will send out the email with your custom invitation settings.
Sent Messages
The 'Sent Messages' sub-heading displays all the emails sent using the 'Send via Email' and 'Send from Mail List' features.
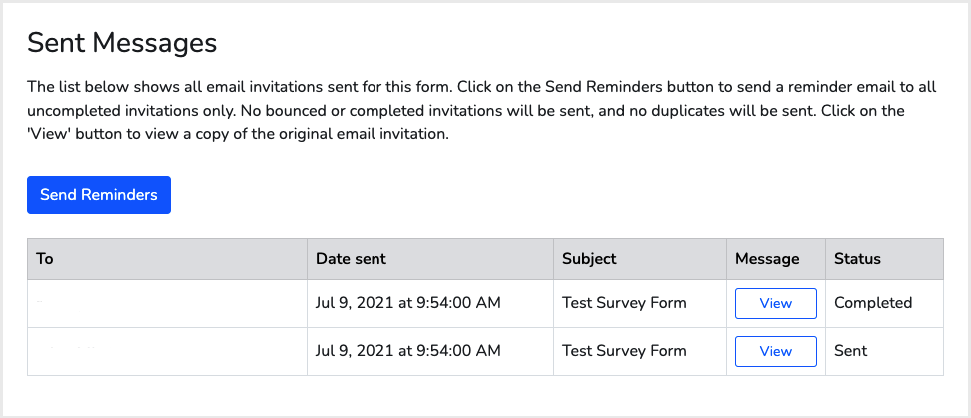
Send Reminders: This button will send an email reminder to the recipients who have not completed the form.
To Email: The email address recipient.
Date Sent: The date and time the email message was sent.
Title: The title displayed within the email.
Message: View the email message that was sent. The option to 'Re Send' is available here too.
Status: View the status of the specific message and if the email has been 'Sent' or 'Bounced'.