Hidden Fields
Learn how to incorporate Hidden Fields throughout your forms
What are Hidden Fields?
A 'Hidden Field' is a something that a form respondent cannot see, but the form creator has access to and can view information specific to the response. These can be incorporated when creating a form, by including both 'Hidden Fields' or 'User Defined Fields' throughout the various features available.
{HF1}: Hidden Field 1
{udf1}: User Defined Field 1
These two HTML tags are essentially the same thing, but the nomenclature is more relevant to how they are used.
The {HF} tag is normally included as a 'Hidden Question' in a form.
The {udf} tag is a User Defined Field which is more about embedding the result in an email.
Hidden Question Usage
The 'Hidden' question is as hidden from the person completing the survey form, and the only information displayed on the screen for this question is the preamble text. If no such text exists, nothing is displayed.
The fields in the hidden question can be populated from completion at the back end, or by data passed into them from the User Defined Fields passed via a mail invitation or can be passed directly as URL parameters.
Up to 6 Hidden Fields (HF1-HF6) may be populated, and the labels of these fields may be entered when creating the question, e.g. If you want HF1 to contain the respondents name then enter 'Name' into HF1. HF1 -HF6 are all labels, and are used instead of HF1-HF6 in any reports.
Hidden Questions take up a form number in your form so if you use a hidden field as question 1, your form will start at question 2. For this reason, it is recommended that you turn off question numbering when using hidden fields anywhere in your form except the last question.
Using a Hidden question as a data validator
A special use of the hidden field in conjunction with a mailing list would be in auto-validating responses from an email invitation.
To do this, create a mailing list using some data in the User Defined Fields, then create a form with the only a hidden question on it, or with an input question with the validation 'Hidden Value'. The invitation link will auto-submit and populate the data and email in the hidden question.
Suggested Use Cases for hidden fields are:
- Use as a welcome/instruction page for the form. Best as the only page 1 question on a multi-page form.
- To pass hidden information into the form which is displayable in reports. Information may be passed as encrypted data from deployment or added manually to the invitation URL.
- Can be used to enter additional information into a form after it has been submitted.
- As a data validation tool to check that emails are still existing, or customer data is correct.
Hide this question in copy emails
If you are passing hidden information into this field from your mailing list, you may not want or need to make this visible on any copy emails or receipts generated by the form. Check this box if you want your hidden data to remain hidden.
In the preamble text or questions
In addition to capturing the data passed into the form in a hidden field, the hidden data passed into your form may be presented in the preamble text or questions of the form as {hf1} to {hf6}, and the data inserted automatically in position at run time.
e.g. If you wish to personalise the form to insert the respondents name, then you could use the following:
Dear {hf1},
Please complete the survey as best you can.
Mailing List Usage
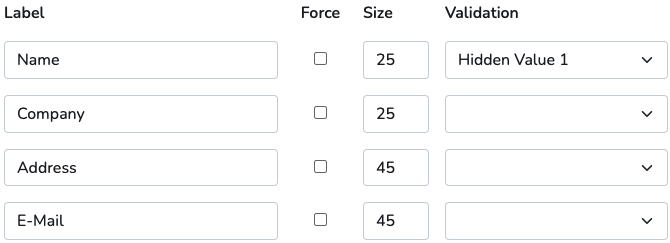
The user defined fields can be incorporated throughout a form, making it personal to the respondent. Within the asset 'Mailing Lists', user defined fields can be input for each entry. Up to eight UDF's can be defined with each field having its own title. It is not necessary to name the user defined fields, but it will be easier to maintain your emails and reports if they are set up.
Populating the Hidden Field from a mailing list invite
The easiest way of getting data into the hidden fields is by using the 6 User Defined Fields available from the 'Mailing Lists'.
The Mailing lists fields will populate the first hidden field question on your form as below:
- udf1 or firstname - hf1
- udf2 or lastname - hf2
- udf3 - hf3
- udf4 - hf4
- udf5 - hf5
- udf6 - hf6
The email is also automatically passed to the results instead of the IP address.
The form URL can be manually edited to pass data into the hidden fields, e.g. adding &hf1=Fred to the end of the form URL will pass 'Fred' into hidden field 1.
Populating the Hidden Field from the back end
The hidden fields can also be manually updated by the back end form owner by logging in and manually entering data into these fields, and can be used in a number of situations for entering entry specific information, e.g. paid, payment date, etc. As before, HF1-HF6 labels can be edited to make the reports more meaningful.
Hidden Field Titles
The hidden field titles or labels that are attached to the data passed into these fields which are used in the reports. They serve no other purpose.
Passing Data into Hidden Fields
Data may be passed into hidden fields either directly from the survey URL as command line parameters, or from mailing list deployments as encrypted command line parameters.
Command Line Parameters: Up to 6 parameters may be passed into the form by adding them to the end of the form URL.
Adding '&hf1=Joe&hf2=Bloggs' to the end of the form URL would pass the parameters 'Joe' and 'Bloggs' into the form. These parameters may be stored in the hidden field in locations 1 and 2, and will be passed transparently through the form and saved in the hidden fields to be viewable in the reports.
Encrypted Command Line Parameters
The data can be passed in encrypted format using the User Defined Fields in the mailing lists.
First Name, Last Name and fields udf3 to udf6 are encrypted and passed directly on the custom URL sent out from the mailer, and data is passed into the 6 hidden fields.
Use Cases
Introduction Page
You could embed a person’s name, or a Projects name for the respondent into the first page of the form using a mailing list. This feature requires a 'Mailing List' to have been set up and created.
- Add a 'Hidden' question type to the beginning of your form. Ensure that the question is on its own separate page compared to the rest of your questions.
- In the question field, you can use the hidden field tags: ‘{HF1-7}’ throughout your text. This will embed information from the mailing list into the form when it has been sent to the respondents via email.
Note! You can only have up to seven user defined fields in the mailing list and this does not include the email address.
- Create the rest of your form by adding and editing your questions. Once it is complete, simply deploy your form via the mailing list.
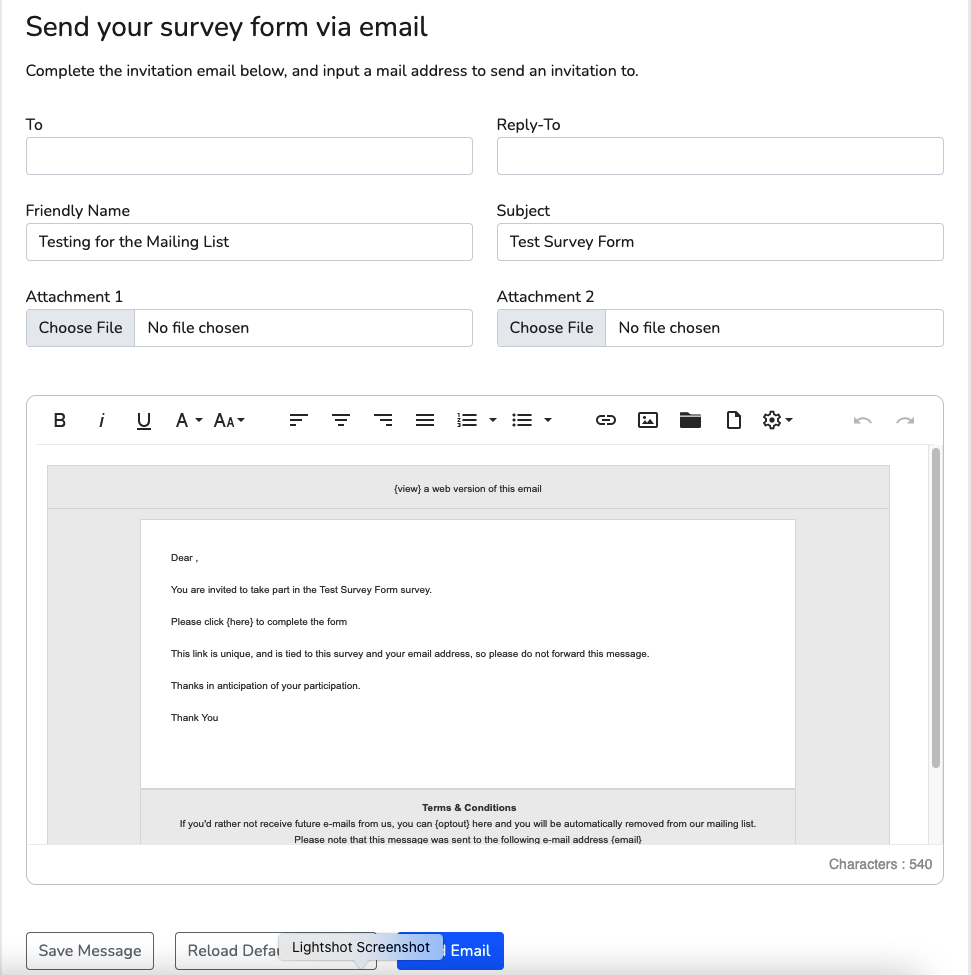
Using Mailing List
When creating a 'Mailing List', the option to include specific User Defined Fields (UDF's)
- Go to the editor’s view on the form you want to send through mail.
- In the top ribbon, there is a an option to deploy, and within that you have an option for ‘Send from Mailing List’
- Select the mailing list you want to send the form to through the drop down menu – and alter the other information in the form (Subject, Friendly Name, Reply-To etc.)
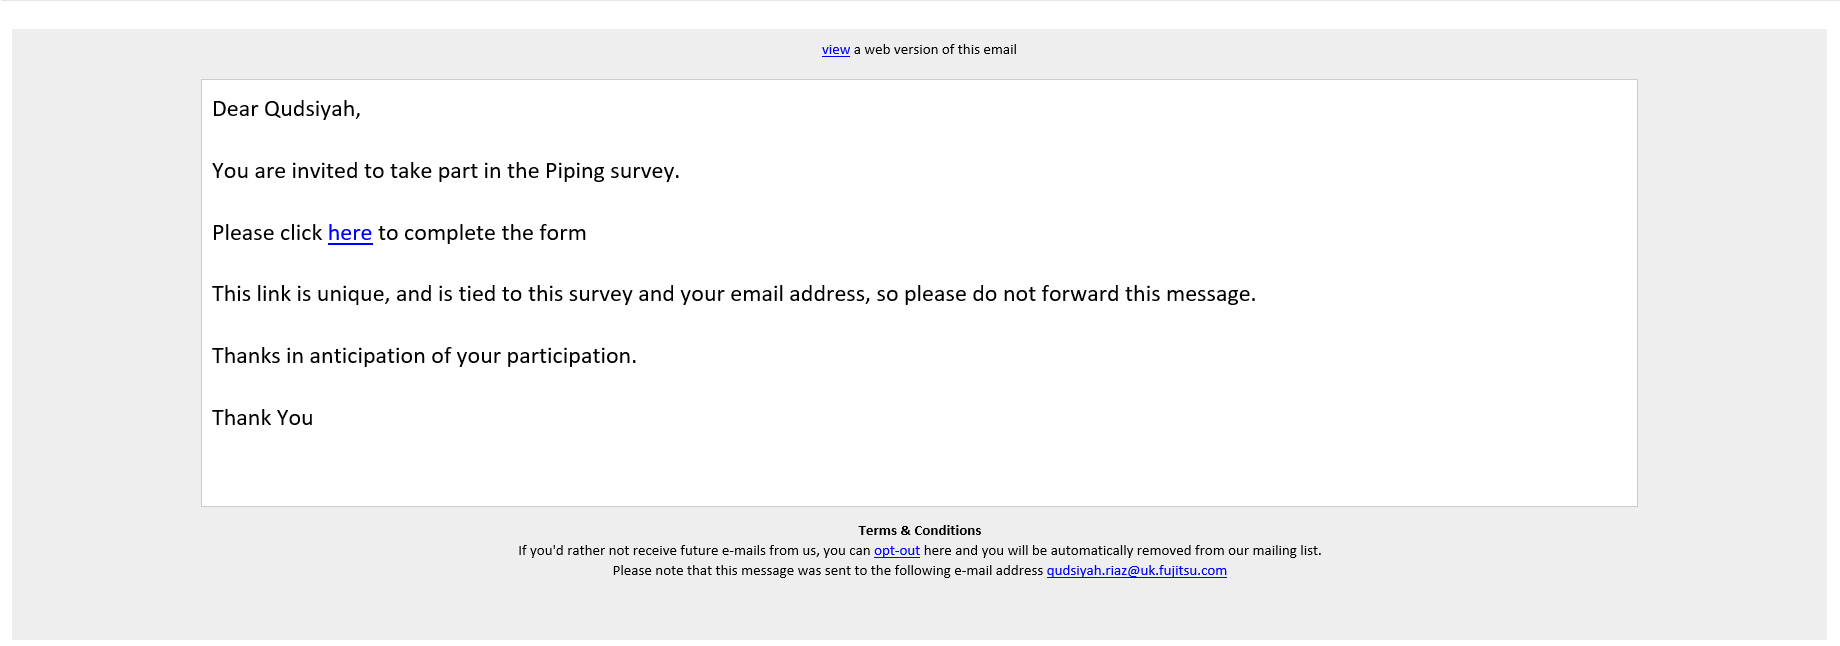
- When you scroll down you will see a template of the email being sent out to everyone…the user defined fields can be applied here… for example: where it says ‘Dear’ you can add {UDF1} – where ‘UDF1’ corresponds to first field in the mailing list.
Using user defined fields in the way described above would send the email like the so (where UDF1 is the name of the individual the form is being sent to):
Pre-Populated Forms
You can also pre-populate forms through the mailing list, with up to 7 pieces of information. This is done using the fields in the mailing list, in this case known as hidden fields.
Once you have created the mailing list, you would need to add some validation in your form.
Under the ‘Input’ question type, you can add in ‘Hidden Value’ validation, which will allow the system to pick up data from the mailing list.
When you deploy the form through the mailing list, the respondent will be able to follow the link and their information will be pre-populated in the form. They can then write-over the fields to correct any information.
Quasi-Anonymous Forms
Hidden Field & a mail-list can be used to send out to your Survey out to a list of people. The recipient would just see an anonymous style form saying 'Dear Colleague', making them think it’s anonymous. In the background there is a hidden field tying the form to their email address!
To implement this:
- Create a mailing list.
- Go to deploy settings of a form you would like to send out quasi-anonymously.
- In the email preview add ‘Dear Customer/Colleague’.
- You can then send out the email.
Using this method, when you receive responses on the form, the system will record the email address which the email was sent to, so the responses can be referred back to an individual. This will be displayed under the reports ’Browse Entries’ sub-heading.