Completion
Learn the completion settings for your form
The 'Completion' heading allows you to modify the settings for respondents upon completion of your form. All form types have different 'Completion' sub-heading options available.
Select one the following form type sub-headings for more information:
Save and Resume
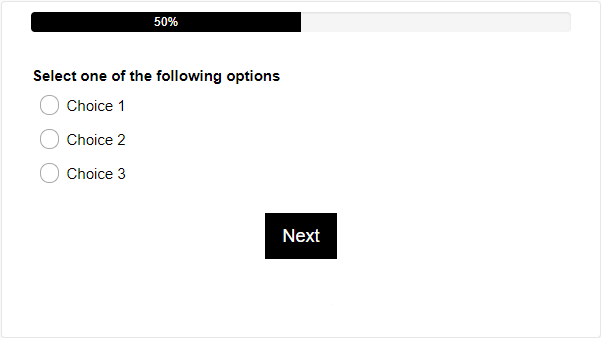
The 'Save and Resume' sub-heading allows the form respondent to submit a partially completed form and return to complete it at a later time. When the form has been partially saved, the data entered is saved up to the point of clicking the 'Save and Resume' button, and a return page is presented. This feature is designed for larger forms, and is best implemented on multi page forms.
Pages that have 'Save & Resume' enabled on it will have an extra button at the bottom right corner of the form.
The respondent can use the provided link in the pop-up display page to return to the form to complete it. Alternatively, the respondent can have the return link emailed to them to complete the form. They can then return to the form as many times as they like before completing their submission.

Enable 'Save and Resume' on all pages: This option allows the respondent to save data on all pages of the form to resume at a later date.
Enable 'Save and Resume' on all pages except the first stage: This option allows the respondent to save data on all pages of the form except the first page. This option is used if the form has an introduction style first page, therefore no saving is necessary as no data will be entered.
Disable 'Save and Resume': This option will turn off all saving and resuming and the respondent will not be able to complete the form at a later time.
Lock the form to prevent further editing following final submission of form: This feature will not allow the respondent to enter the form again from the resume URL following final submission of the form.
Advice for forms browser respondents (not forms creators) wanting to go back a page on forms to make an edit or check their inputs:
- Using a Browsers (IE, Edge, Chrome etc.) own page back button on the ribbon or toolbar is NOT advised.
- Using a forms Previous button (on the bottom of forms) is NOT guaranteed, but may work in some, but not all browsers.
- The only guaranteed method is using the 'Save & Resume' button that can be added to the bottom of any forms. This guarantees the data can be saved and returned to.
More info:
Browsers are not all equal. Browsers do not all act the same on every web site…. but hey you knew that!
- When you hit a Browsers 'Back' button, you're not asking the web server for the page data again (AJAX). Instead, you're just fetching the data which was added locally (no GET is re-performed to the server).
- We use JavaScript, which is a bit of interactive local code that runs in your browser on pages at certain times. When you hit the 'Back' button, the JavaScript is not run again (unless it's supposed to).
- JavaScript variables (i.e. the data entered into single or multiple page form by respondents one page at a time) are dumped and reloaded with each page load (the web is (generally) stateless). Stateless, meaning, no data is saved as you enter it field-by-field or page by page. Stateful is when you use our 'Save & Resume' feature to save data as you piecemeal add it and save as you go along.
- Analogy: In Word processing, if you have auto save turned off this means the only guarantee of word processed page data being saved is when you manually press the save button.
- In forms, the Word Processing manual pressing of 'Save' as you go along method is equivalent to pressing 'Save & Resume' on the bottom of the form.
There is no concept of guaranteed auto-save on the web.
Completion Action
The 'Completion Action' sub-heading allows you to set the action for the respondent when they complete the form. The 'Completion Message' sub-heading relates to this feature as you can set whether the action happens before or after the message is displayed.
Close the browser window (only if it was opened by the form link): This option will close the window that the form was opened in. If the form wasn't opened in a new window, then the window will not be closed.
Return to the form with data: This option will redirect the respondent back to the start of the form and their entered data will be displayed.
Return to a cleared form: This option will redirect the respondent back to the start of the form but it will be cleared with no previous data entered.
Re-direct to another URL after completion: This option will redirect the respondent to a different URL that is preset by the form creator. The form will automatically direct the respondent to this URL after they have clicked 'Send Form'. This is useful when more than one form or a related form needs to be completed by the respondent.
- Show the completion message before redirecting: This option will display the completion message before redirecting the respondent to a different URL. The respondent will be redirected after they have clicked 'Finish' underneath the completion message. If the completion text is not set, then a default message will be displayed for the respondent.
Do Nothing: This option will display the completion message for the respondent and no other action will be available. No 'close' button will be displayed. This is the default setting for this sub-heading.
Completion Emails
The 'Completion Emails' sub-heading allows you to keep track of submitted entries to your form. This feature can be useful when a form is completed infrequently, or to keep track of when a specific group of respondents are to complete a form.
The email will contain the time, date and unique ticket number for the submission, and if 'Copy' was requested, list every question along with the response obtained for it.
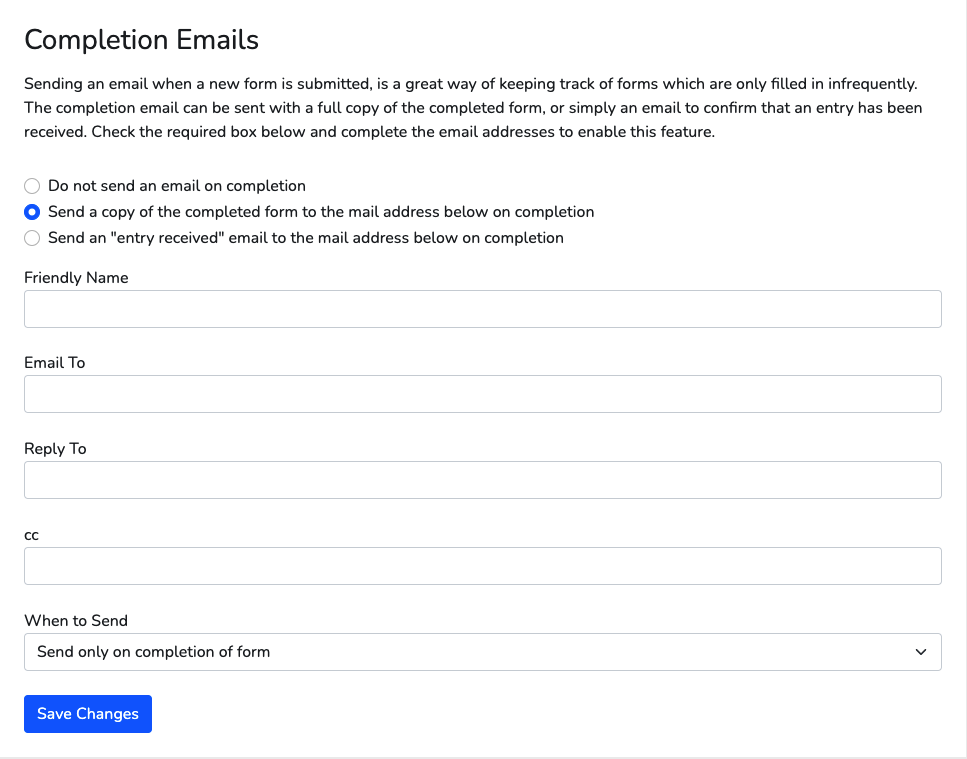
Do not send an email on completion: This option will not send any email upon completion of a form by a respondent. This is the default setting for this sub-heading.
Send a copy of the completed form to the mail address below on completion: A copy of the respondents entry with data will be sent to the email address.
Send an 'entry received' email to the mail address below on completion: An email will be sent when a respondent completes a form, but no questions or question data will be included.
Friendly Name: Edit the email friendly name. This will automatically be set to 'forms' if not defined.
Email To: Edit the primary email address that will receive the email.
Reply To: Edit the email address that will receive emails when a recipient replies to your invitation.
CC: Edit the email address recipients that will be CC'd copies. When entering more than one email address, use a semi colon ( ; ) to separate them.
When to Send (If a 'Save and Resume' option is set):
- Send only on completion of form: This will send an email when the respondent has completed the entire form.
- Send after Save and Resume and on completion: This will send an email when the respondent has used the 'Save and Resume' option and also when the form has been completed.
Completion Message
The 'Completion Message' sub-heading will display a custom message to the respondent upon completion of the form. This feature is commonly used as a message to thank the respondent for completing your form. Any other relevant information that the respondent might need (e.g. follow up actions, contact details) can be displayed here as 'Outro' text. A default message will be displayed here if no text has been entered.
'Tokens' can also be embedded within your completion message and will be replaced by real time data that is specific to the respondents entry:
{ticket}: This provides the respondent with a unique reference number made up of the form ID number and form ticket number e.g. 12345-1 (form id - ticket number).
{editlink}: This provides the respondent with a clickable link to re-visit their form to edit the entry. The text 'edit your form' will be displayed with a hyperlink back to the respondents entry and the forms data will be kept for when the respondent returns to edit it.
Event Confirmation Email (Event specific)
The 'Event Confirmation Email' sub-heading is an Event specific setting that sends out an email upon event registration. Optionally, an 'iCal' file can be attached which will write the event into a calendar that supports iCal, and a reminder can be enabled.
Friendly Name: Edit the email friendly name. This will automatically be set to a default example if not defined.
Reply-To: Edit the email address that will receive emails when a recipient replies to your invitation.
Confirmation:
- Receipt: A copy of the form entry that was submitted by the respondent.
- Custom Email: A custom email message confirming the date and time of the event. Run time tokens can be added to your custom text:
- {event}: The name of the event taken from the form title.*
- {eventlocation}: The location/venue of the event.*
- {firstname}: The first name of the respondent.
- {lastname}: The last name of the respondent.
- {email}: The email address of the respondent.
- {startdate}: The date the event starts.*
- {starttime}: The time the event starts.*
- {enddate}: The date the event finishes (if 1 day event defaults to start date).*
- {endtime}: The time the event finishes.*
- {ref}: This can be used to give a unique booking reference made up of form number-ticket number.
- {editlink}: This will be replaced with a unique URL that when clicked on will re-open the form for editing and changing details.
* : These parameters can be hard coded into the email rather than being run time settings
Send iCalendar: A calendar invite will be created and attached to the email sent to the respondent. Optionally, a reminder can also be set for the event.
Reload Default Message: This button will reset your custom email invitation message back to the default email invitation message.
Test Settings (Test specific)
The 'Test Settings' sub-heading is a Test specific setting that sets your type to 'Pass/Fail' or 'Weighted Score'. This is set upon creation, but if you wish to change the test type you should revisit all of the questions to ensure the test operates as expected.
Pass/Fail Test: When creating a 'Test' form type, it is important that you decide on your overall pass mark. The 'Set a Pass Mark' will determine the completion message and completion action depending on if the respondent has passed or failed.
Weighted Test: The 'Weighted Test' type can score the respondents test in two different ways. Both of these options will produce every type of displayed result option.
- Add answer values together for total score: Every answer will be added up and that number will be compared to the number of questions answerable on the form.
- Average answer values for total score: Every question would be scored on a scale e.g. 1-10. Upon completion of the test, the score would be totaled and divided by the number of test questions to find the average, thereby giving a total score between 1 and 10.
Display the Results (Test specific)
The 'Display the Results' sub-heading is a Test specific setting that allows you to edit the display of the respondents results.
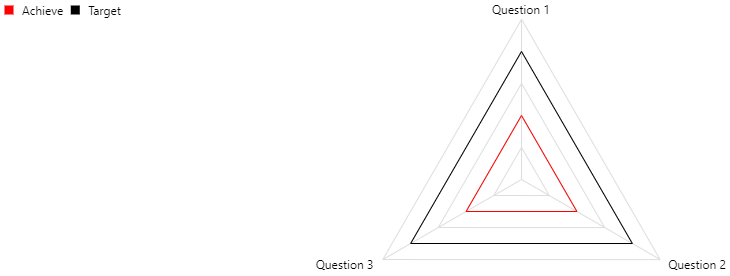
The results to a 'Weighted Test' can be displayed in a range of graph types:
Bar Chart

Radar Chart
Traffic Lights
No Graph
Simply displays no graph!
Show Text or Score Text
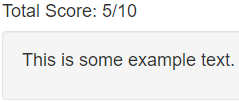
Enable this option to display the 'Result Messages' text beneath the test score graph and the respondents score.
Result Messages (Test specific)
The 'Result Messages' sub-heading is a Test specific setting which acts the same as a regular 'Completion Message' option, but with abilities specific to this form type. Both types of test have their own unique results display:
Pass/Fail Test
A different customised completion message can be displayed depending if the respondent has passed or failed the test.
Score variables can also be embedded within a test completion message e.g. Congratulations, you have passed the test! You scored {correct} out of {total}. The words inside of the curly brackets are automatically replaced with a number depending on which variable it is. Insert the following variables into your completion message that apply to your statement:
Correct answers: {correct}
Wrong answers: {wrong}
Percent score: {percent}
Total questions in test: {total}
Weighted Test
Up to three different result messages could appear for the respondent based upon the score attained. Test score ranges can be pre defined and three different custom messages can be entered to display to the respondent.
The score ranges for each question are entered in the From/To boxes, to the left of the message text boxes (shown circled in red below), and the message relating to that score range only will be shown on completion.
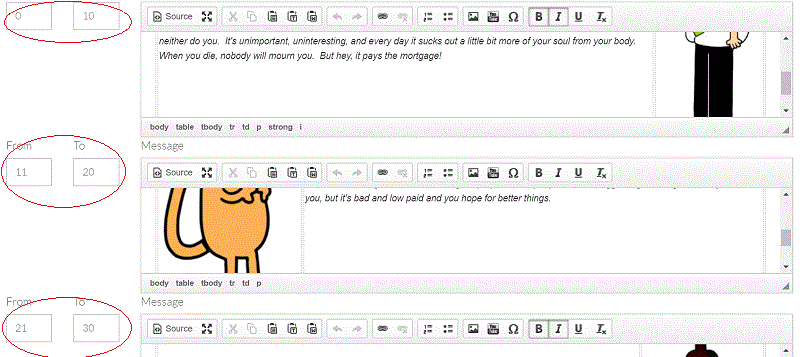
The messages can be designed using the rich text message editor, and images or other files included where appropriate, from the Asset Library.
Completion Action (Test specific)
The 'Completion Action' is a Test specific sub-heading (it is different to the previous Completion Action sub-heading that was described). This option allows the copy of a test entry to be sent to an email address.
The 'Pass/Fail Test' allows the respondent to be linked to a different URL upon completion of the test. A different pass and fail URL can both be set in this section. If both URL links are left blank, the form will be displayed again after submission.
Friendly Name: Edit the email friendly name. This will automatically be set to 'forms' if not defined.
Email To: Edit the primary email address that will receive the email.